Walkthrough 12-2: Trigger a flow when a new record is added to a database and use automatic watermarking
In this walkthrough, you work with the accounts table in the training database. You will:
· Add and configure a Database listener to check a table on a set frequency for new records.
· Use the listener’s automatic watermarking to track the ID of the latest record retrieved and trigger the flow whenever a new record is added.
· Output new records to a CSV file.
· Use a form to add a new account to the table and see the CSV file updated.
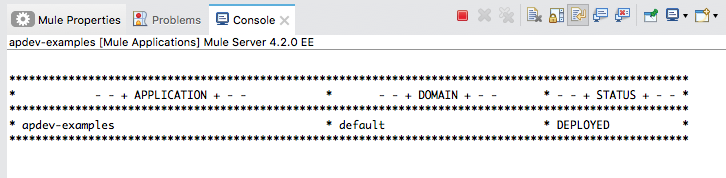
Starting file
If you did not complete the previous walkthrough, you can get a starting file here. This file is also located in the solutions folder of the student files ZIP located in the Course Resources.
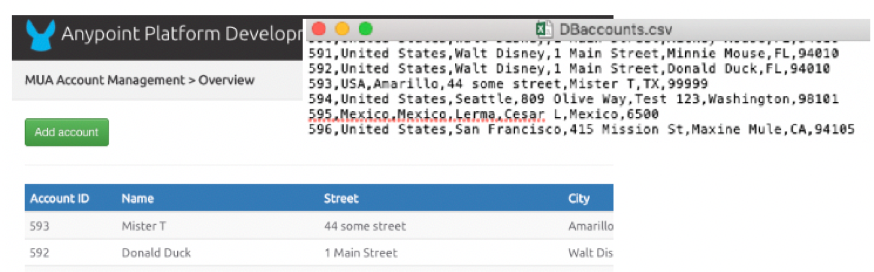
View accounts data
1. Return to the course snippets.txt file and copy the text for the MUA Accounts URL.
2. In a web browser, navigate to the MUA accounts by pasting the URL.
3. Review the data and the names of the columns—which match those of a database table.
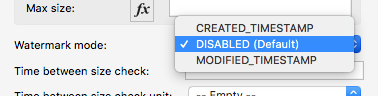
Look at the File listener settings for watermarking
4. Return to accounts.xml in Anypoint Studio.
5. Return to the accounts.csv properties view for the listener in getCSVaccounts.
6. Locate the watermark mode setting in the General section and look at its possible values.
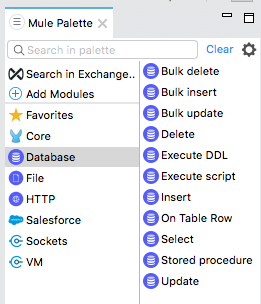
Add the Database module to the project
7. In the Mule Palette, select Add Modules.
8. Select the Database connector in the right side of the Mule Palette and drag and drop it into the left side.
9. If you get a Select module version dialog box, select the latest version and click Add.
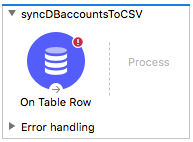
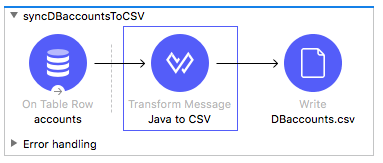
Create a flow to monitor a database
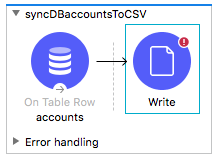
10. Locate the On Table Row operation for the Database connector in the right side of the Mule Palette and drag and drop it at the top of the canvas to create a new flow.
11. Rename the flow to syncDBaccountsToCSV.
Configure a Database connector
12. Return to the course snippets.txt file.
13. Locate and copy the MySQL (or Derby) database properties in the Module 4 section.
14. Return to config.yaml and paste the properties.
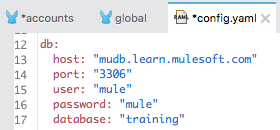
15. Save the file.
16. Return to global.xml and create a new Database Config that uses these properties.
Note: If necessary, refer to the detailed steps in Walkthrough 4-2.
17. Add the MySQL (or Derby) JDBC driver.
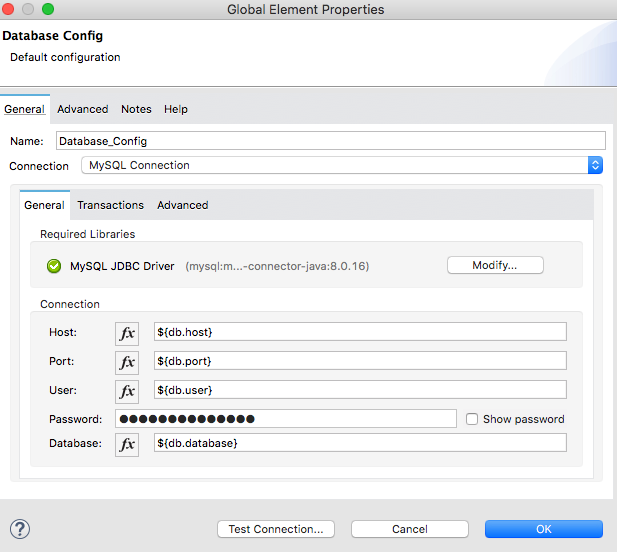
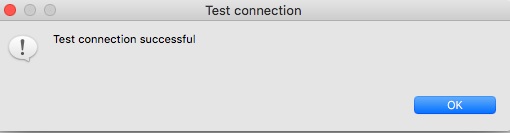
18. Test the connection and make sure it is successful.
Configure the Database listener
19. Return to accounts.xml.
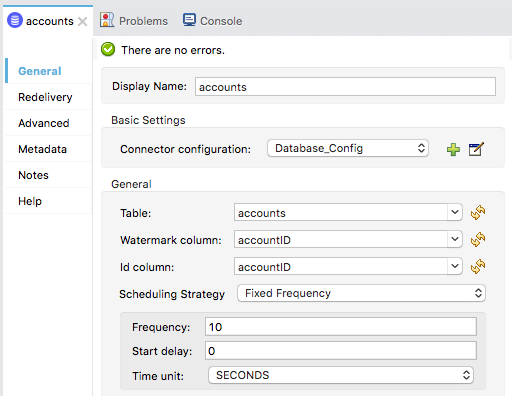
20. In the On Table Row properties view, set the following values:
· Display Name: accounts
· Connector configuration: Database_Config
· Table: accounts
· Watermark column: accountID
· ID column: accountID
· Frequency: 10
· Time unit: SECONDS
Write new records to a CSV file
21. Add a File Write operation to the flow.
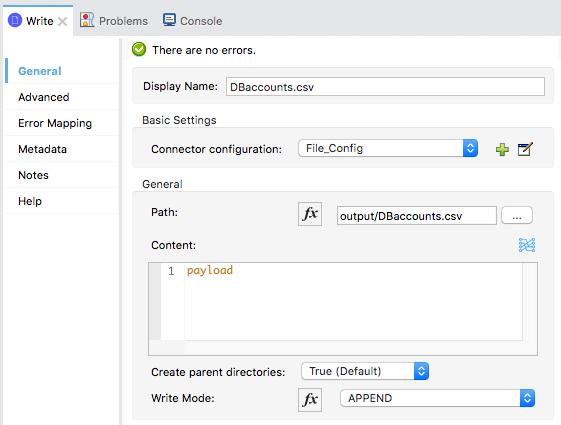
22. In the Write properties view, set the following values:
· Display Name: DBaccounts.csv
· Connector configuration: File_Config
· Path: output/DBaccounts.csv
· Write mode: APPEND
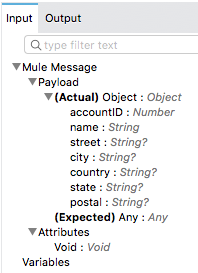
23. Expand Payload in the Input tab in the DataSense Explorer; you should see the operation will get an account with account information from the Database operation.
Transform the records to CSV
24. Add a Transform Message component before the Write operation.
25. Change the display name to Java to CSV.
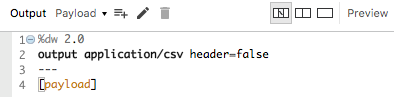
26. In the Transform Message properties view, change the output type to application/csv and add a header property equal to false.
27. Set the body expression to [payload].
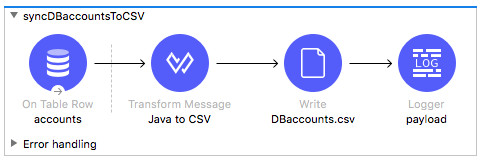
Add a Logger to display the records
28. Add a Logger to the end of the flow.
29. Change the display name to payload.
30. Set the message to display the payload.
Set the application to prompt to clear application data when it starts
31. Add a breakpoint to the Transform Message component.
32. Save all files then, in the main menu, select Run > Debug Configurations.
33. Select apdev-examples in the left menu bar under Mule Applications.
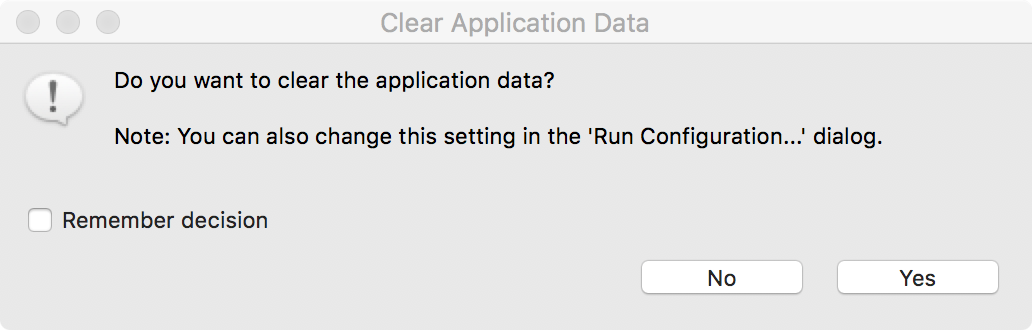
34. In the Create, manage, and run configurations dialog box, locate the Clear Application Data section in the General tab and change it to Prompt.
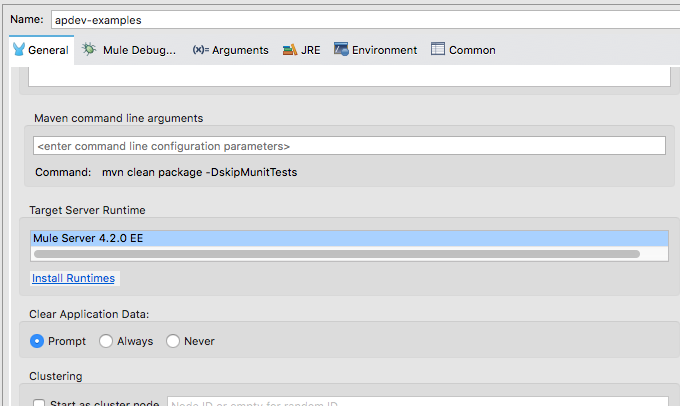
Note: You need to rerun or debug an application to get the prompt; you cannot just save to redeploy.
Debug the project
35. Click Debug.
36. In the Clear Application Data dialog box, click Yes.
37. After the breakpoint is hit, in the Mule Debugger, expand Payload.
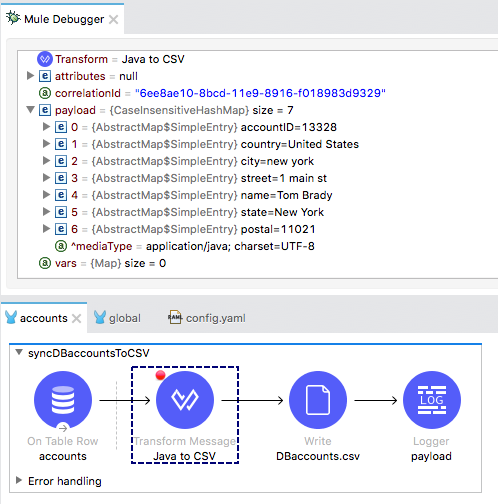
38. Click Resume and step through several of the records.
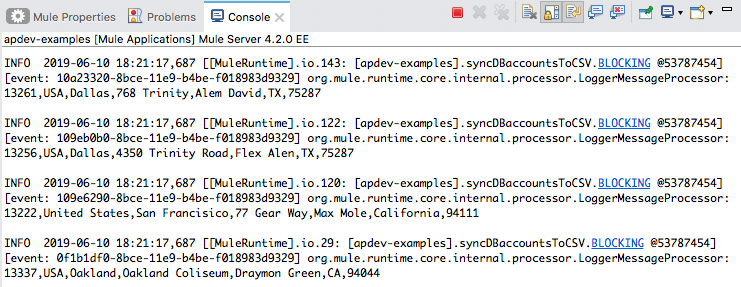
39. Look at the console; you should see the records displayed.

40. Stop the project and switch perspectives.
Clear application data and test the application
41. Run the project.
42. In the Clear Application Data dialog box, click Yes.
43. Look at the console; you should see many records.
44. Stop the project.
45. Return to the resources folder in your computer’s file explorer; you should see a new DBaccounts.csv file appear in the output folder.
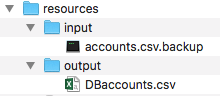
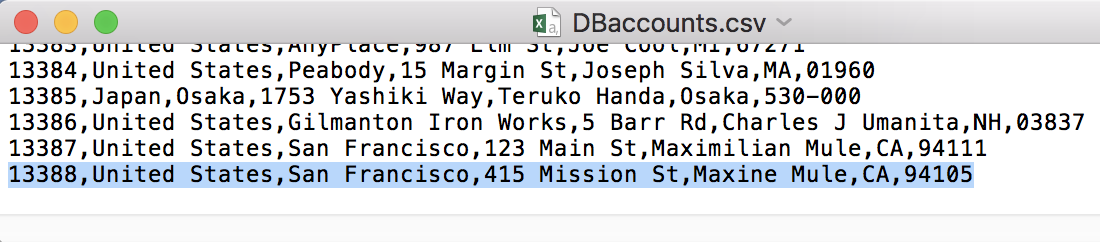
46. Open the DBaccounts.csv file with a text editor; you should see the records.
47. Close the DBaccounts.csv file.
Test the application again without clearing application data
48. Return to Anypoint Studio and run the project.
49. In the Clear Application Data dialog box, click No.
50. Look at the console; you should see no new records output (unless someone else just added one!).
Add a new account to the database
51. Return to the MUA Accounts page in the web browser.
52. Click Add Account.
53. Fill out the form with data and click Save.
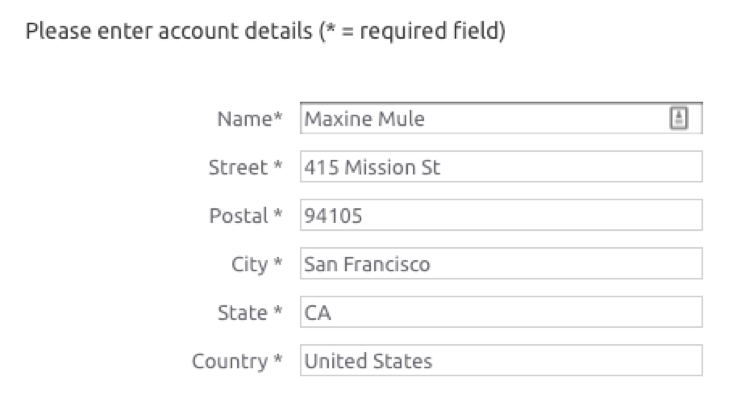
Note: Do not use quotes, especially in the name field. Also, set the postal code to a specific value. In the next walkthrough, you will retrieve only new records with this specific postal code, so you do not get all of the records.
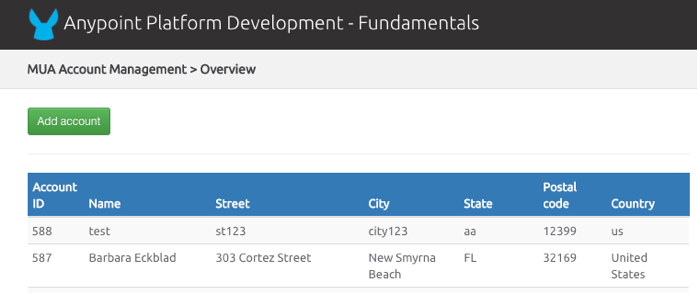
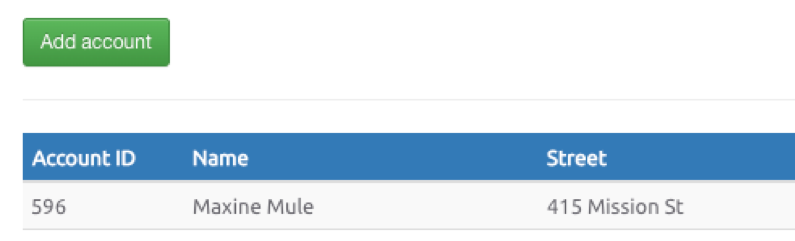
54. On the MUA accounts page, locate your new account.
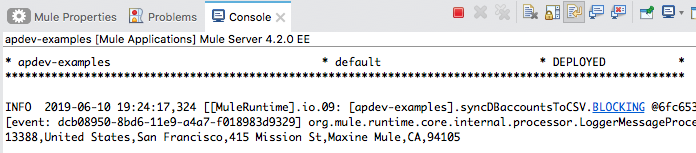
55. Return to the console in Anypoint Studio; you should see your new record.
56. Stop the project.
57. Return to your computer’s file explorer; the modified date on the DBAccounts.csv file should have been updated.
58. Open DBaccounts.csv and locate your new record at the end of the file.
59. Close the DBaccounts.csv file.